Make your own Astrolabe
1. Introduction
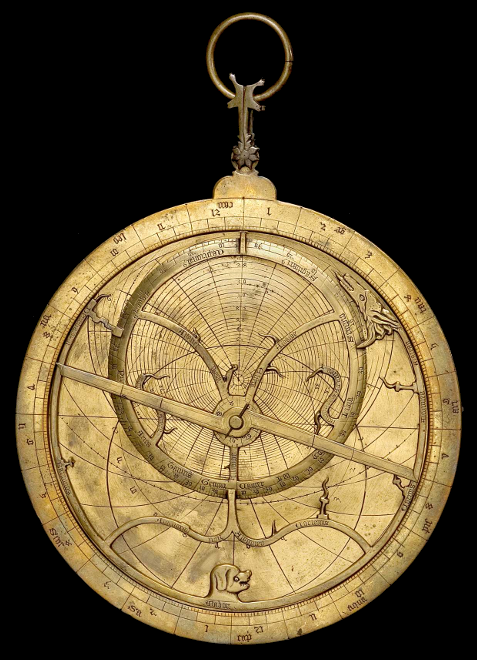 A brass astrolabe dating from circa 1370, closely resembling the instrument described in Chaucer's
Treatise on the astrolabe (1391).
Image courtesy of the Museum of the History of Science, Oxford (artifact 49359).
A brass astrolabe dating from circa 1370, closely resembling the instrument described in Chaucer's
Treatise on the astrolabe (1391).
Image courtesy of the Museum of the History of Science, Oxford (artifact 49359).
Astrolabes are elaborate astronomical instruments, combining a mechanical model of the sky's rotation with a simple sight, which can be used to make observations of the elevation of objects above the horizon. Put together, these tools allow the user to tell the time, identify objects in the sky, and predict when objects will rise and set.
In the Middle Ages, astrolabes were the most sophisticated astronomical instruments in widespread use, a position which they held for nearly two thousand years, from the time of their invention by Hipparchus (c. 190–120 BCE) until the turn of the seventeenth century. They only fell out of use around the time that the telescope was invented in 1609, as astronomers began to require more precise tools.
Today, the curious astronomer who wants to learn more about medieval observing practice may find it hard to find a specimen to play with. Historical examples are highly valuable, and usually found only in glass cases in museums. To solve this problem, I have created a cardboard cut-and-glue kit which you can download and print to make your own model astrolabe.
The design presented here is based upon one described by the English poet Geoffrey Chaucer in his Treatise on the astrolabe, published in 1391. In a series of three papers published in 1975–6, American historian Sigmund Eisner provided detailed geometric instructions for recreating Chaucer's astrolabe, which I follow closely.
Download your astrolabe
The design of an astrolabe depends on the geographic location where it is to be used, since different stars are visible from different places. I have created kits for use at a wide range of latitudes, and you should use the form below to download the kit that most closely matches where you live.
Astrolabes are available in two varieties: a full astrolabe which has all of the features described in Sigmund Eisner's papers and in the pages which follow, and a simplified astrolabe which has only the essential features, and may be more appropriate for use with groups of children, for example.
Building your astrolabe
Assembly instructions
Step 1 – Download an astrolabe kit using the form above. You can either download the individual components separately, or as a single PDF file. In order to fit together, the pieces must be printed at the same scale, which is easiest achieved with the single PDF file.
For your present location of South El Monte, we recommend a astrolabe designed for latitude 35°N, which you can download here .
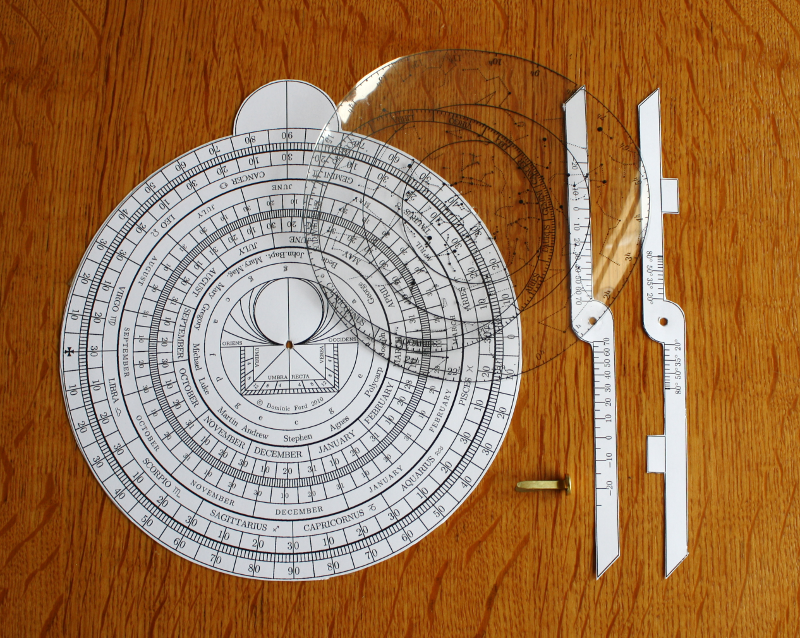
Step 2 – Print the front and back sides of the mother onto separate sheets of paper, or more preferably onto thin card. Also print the rule onto paper or card. The rete should be printed onto a sheet of transparent plastic, such as acetate sheets sold by most stationery suppliers.
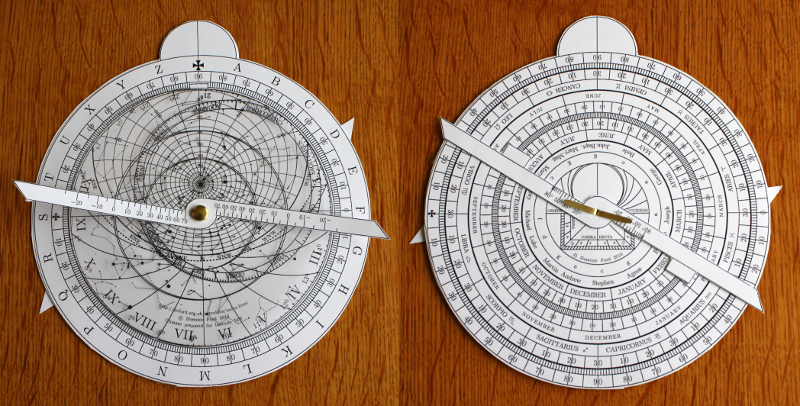
Step 3 – Cut out the front and back sides of the mother, and glue them back to back. You may wish to sandwich a piece of cardboard between them to make your astrolabe more rigid.
Step 4 – Place the rete, printed on transparent plastic, over the front of the astrolabe.
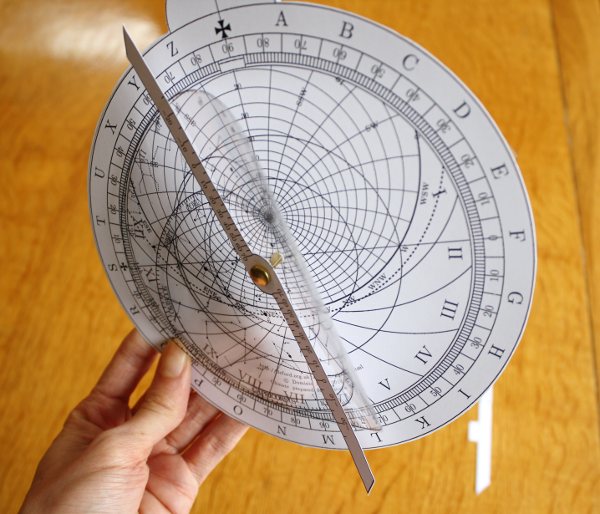
Step 5 – Cut out the rule and the alidade. The rule (on the left) should be placed over the top of the rete, on the front side of the astrolabe. The alidade should be placed on the back of the astrolabe.
Step 6 – Now all of the parts of the astrolabe need to be fixed together with a split-pin fastener.
All of the components have small circular holes marked, which you should cut out. If you have a paper drill to hand, these are ideal, but otherwise you can use a compass point and enlarge the hole until it is around 2mm across by turning the point in a circular motion.
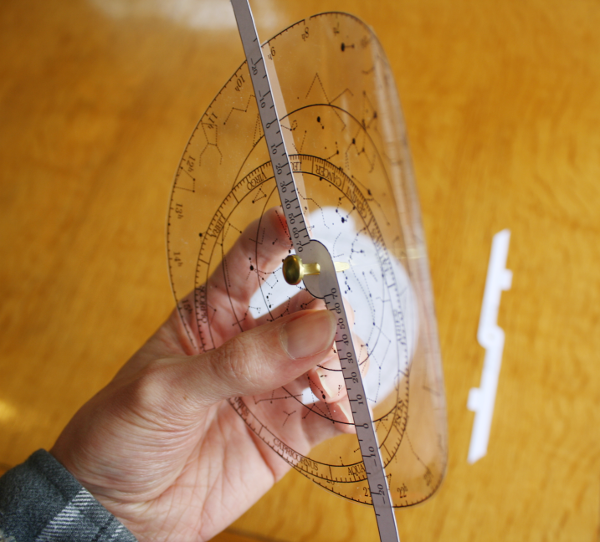
Once all the holes are made, slide a split-pin fastener through the rule, rete, mother and alidade of the astrolabe in turn, and fold the split pins back to fasten the astrolabe together. Ensure that the central hole is big enough that the alidade, rete and rule can turn freely.
Congratulations, your astrolabe is now ready for use. Click next below to learn how to use the astrolabe.
License
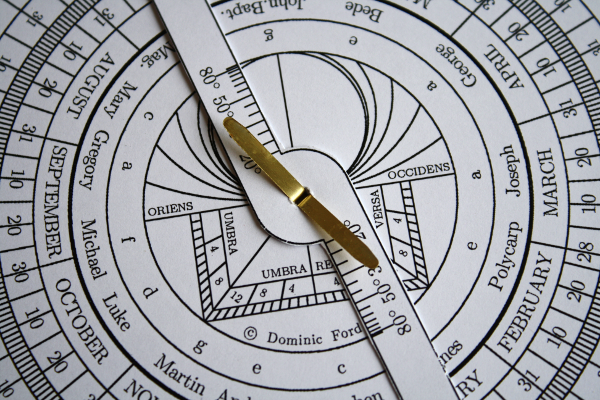
Like everything else on this website, these astrolabe kits are © Dominic Ford. However, they are provided for the benefit of amateur astronomers worldwide, and you are welcome to modify and/or redistribute any of the material on this website, under the following conditions: (1) Any item that has an associated copyright text must include that unmodified text in your redistributed version, (2) You must credit me, Dominic Ford, as the original author and copyright holder, (3) You may not derive any profit from your reproduction of material on this website, unless you are a registered charity whose express aim is the advancement of astronomical science, or you have the written permission of the author.